Intro
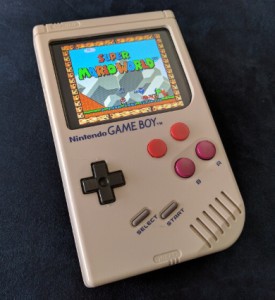
I came across this post on Reddit and thought it was a great idea so I wanted to make one as well. I used to play games on a NES and the C64 so this would be a great DIY retro hand-held that is able to emulate these and a lot more. Later on I found the great guide series by wermy on YouTube, highly recommended if you would like to build this yourself. His guide gives a lot of information, however I did not follow it exactly and used some different parts to build my version. A college found a set of broken GameBoy’s online that looked ok but that were missing the the battery cover, we later found out. Luckily you can buy separate battery covers for the GameBoy on Aliexpress.
Build
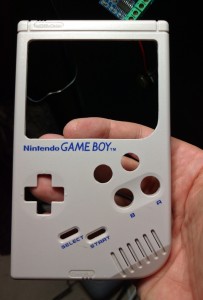
I started by modifying the case. Drilling the extra holes for the extra buttons and expanding the hole for the display is imho the most scary part of the adjustments to the case. After quite some fiddling with my dremel and filing by hand I ended up with this:
Next thing I did was remove the internals and cut the original motherboard in half so I could use the lower part for the controls. Following wermy’s guide I removed all the unnecessary parts and connected wires to all the button traces and connected all the ground traces together. Be sure to use thin wires and glue them down to avoid them breaking off the board.
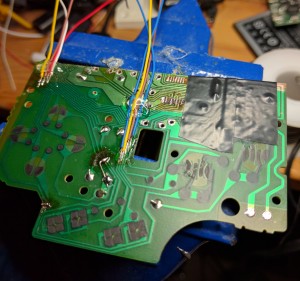 I also added tape and put copper tape over it to create support for the extra X and Y buttons. I bought a NES controller clone to get the extra buttons and the rubber support beneath it. I also cut out the round spacers around the buttons that guide the button and make sure it stays in place. I glued them to the back of the case in the same configuration. For the rest see wermy’s guide for details on this. Instead of using the Teensy LC mentioned in his guide I used an Arduino Leonardo clone as it is also able to emulate a keyboard and it is a lot cheaper and easier to get. After modifying the code (that turns button presses into keyboard keys) that wermy used to work with the Leonardo it works great.
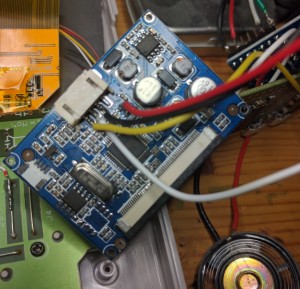
Next up was the screen. I used my multimeter to find the 5V section of the driver board so I could power the screen from 5V instead of the 12V it normally runs on. Be careful when handling the brown ribbon cable as it is quite fragile. The white wire in the picture is not needed.
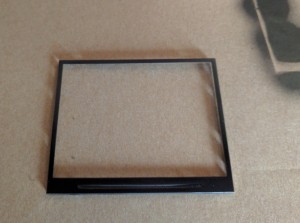
Next I removed the metal enclosure around the screen so I could spray paint it black so it will nicely blend in with the screen as part of it is visible when the screen is inserted into the GameBoy.
I used a different battery charger and booster board (it boosts the battery voltage to 5V). And found out that with a bit of dremeling I could fit the board directly behind the original charging port that I also made a bit bigger so the micro USB cable will fit.
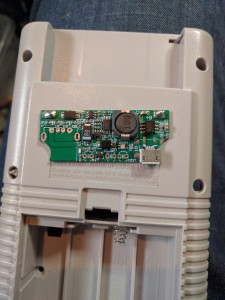 I removed the big USB connector and soldered wires directly to it. The battery is connected by soldering wires to the battery + and – terminals on the board and to the battery (be very careful when doing this).
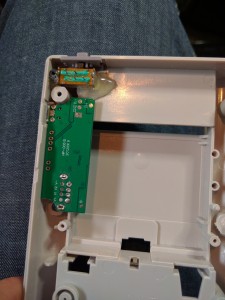 On top is the original on/off switch that I removed from the original motherboard and glued into place using a piece of plastic on the left side for extra support so it won’t move.
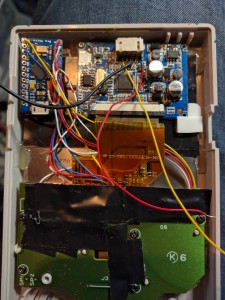 Here I test-fitted the screen with the driver board for the screen and the Arduino Leonardo and the button board. I later moved the Arduino down and the driver board a bit to the left to make room for the plastic mounts for the top part of the GameBoy that are removed earlier on to make room for the screen (this is described in detail by wermy).
I had quite some difficulty sourcing a cheap and small 4 port USB hub. The issue is that the Raspberry Pi Zero seems to be quite picky when it comes to USB hubs. It detects the hubs I got earlier fine but as soon as you connect a keyboard via the hub it just does not show up at all (no output in dmesg or lsusb). However when connecting the same hub to my laptop it worked fine. I found a hub based upon the FE1.1s USB hub IC by Terminus Technology Inc that works really well and does not have the keyboard issue. I removed all the USB plugs on the hub to save space and placed one of these connectors in the ext. connector port in the case.
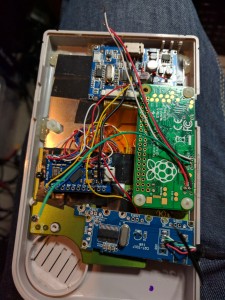 I added the Raspberry Pi Zero it self and used some plastic spacers to align it perfectly to the original hole in the case where the contrast control was. This however required to de-solder a capacitor from the screen driver board as it as in the way of the micro sd card placed into the Rpi. I connected it back using some wires so I could move it out of the way.
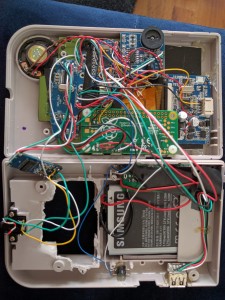 I removed all connectors from the audio amplifier board and placed it with the pot meter (aka volume control wheel) nicely behind the original port in case. I connected it via a USB audio card and the original headphone jack so it will interrupt the speaker when plugging in the headphones. I added L and R buttons in the back of the case inside the screw holes. I mounted the battery inside the game cartridge as it fits perfectly and it would even be possible to quickly swap batteries this way. It is a 2500mAh battery so it should last for over 4 hours on a single charge. In the future I would like to clean up the mess of wires that is currently inside the GameBoy but it works great as it is 🙂

Hi, I’m going to build a GB Zero but I don´t know if the battery charger that you use is the one I need. What’s the different between your battery charger and the Adafruit battery charger? Thanks
Hi! I think they are both the same from functional standpoint but it has no Low Battery function on-board,
so outside monitoring is required. If you don’t need/want this it is a lot cheaper! See this page for more info:
http://www.sudomod.com/wiki/index.php?title=GBZ_Power_Supply
Good luck with your build!